Shares 2
How to Adjust Rear Disc Brake Of A Motorcycle?
Last updated on 19-Jun-2026 , By Saleh
How to Adjust Rear Disc Brake Of A Motorcycle?
Proper motorcycle service and maintenance are essential to ensure the proper functioning of the machine and keep a motorcycle running smoothly and safely. Regular maintenance helps prevent breakdowns, extends the life, and improves the performance of the motorcycle. Relatively, regular maintenance and adjustment of the motorcycle braking system are also essential. Therefore, here we will focus on how to adjust the rear disc brake of a motorcycle, providing you with step-by-step instructions for maintenance.
How to Adjust Rear Disc Brake Of A Motorcycle?
Properly functioning brakes are essential for the safety and performance of a motorcycle. If a motorcycle is equipped with a hydraulic disc braking system at the rear, it's important to know how to adjust it to maintain optimum braking performance. Maintenance and adjustment of hydraulic disc brakes require a slightly different approach than conventional drum-type brakes.

Adjusting the rear disc brakes can be done with some basic tools and a little technical knowledge. Here are some general guidelines and common maintenance tasks that apply to most motorcycles to maintain and adjust the rear disc braking system.
Gather The Necessary Tools
Before you begin adjusting the rear disc brake of your motorcycle, ensure you have a clean and well-ventilated workspace with adequate lighting. Then gather the necessary tools for the maintenance work. The tools you will need include:
- A set of socket wrench
- Allen keys or wrenches
- Flathead and Phillips screwdrivers
- Hydraulic brake fluid bleeding tool
- Brake fluid
- Brake cleaner
- Brake pads (if necessary)
- Some cotton rags
Start Safely And Locate The Rear Brake Caliper
Once you have arranged all the tools and have a well-facilitated workspace, lift the motorcycle on a center stand or lift stand to get the rear wheel off the ground. Put on eye goggles and a pair of protective gloves to prevent any potential injuries. Locate the rear wheel brake assembly, which is usually on the right-hand side of most motorcycles.
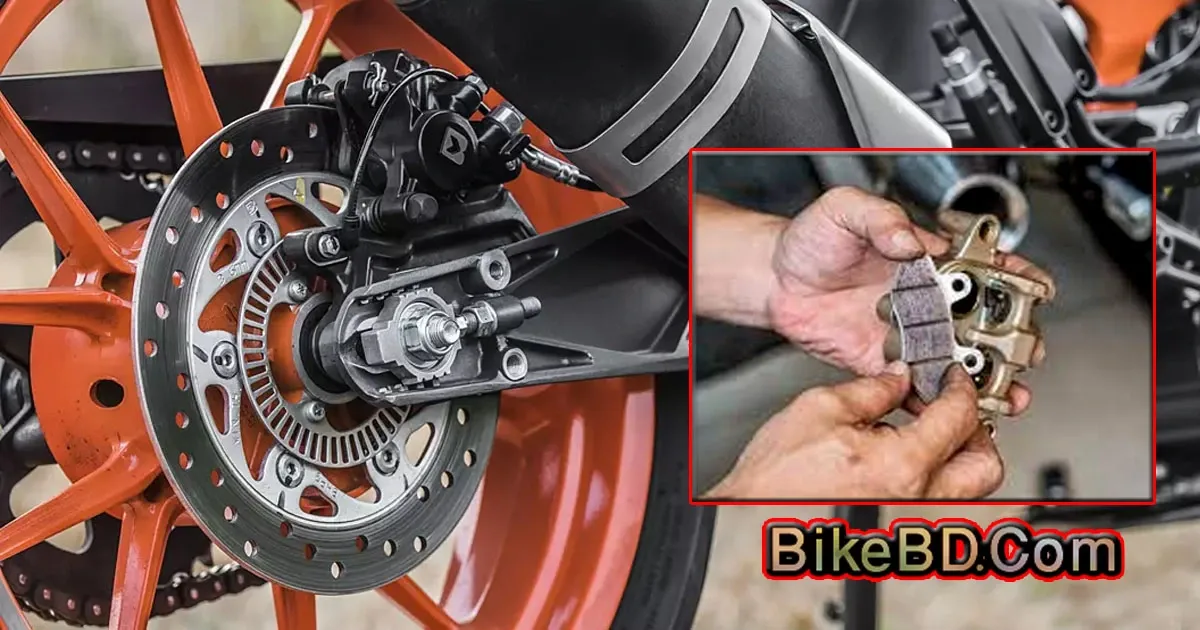
The rear brake disc is attached to the wheel hub, and the brake caliper is typically attached to the swingarm with a metal bracket that holds the brake pads in place. The rear brake caliper is the mechanism that applies pressure to the rear brake pads through hydraulic pressure applied by the brake lever. So, to adjust the mechanism, you need to remove the brake caliper and also the rear wheel.

Remove The Rear Wheel And Brake Caliper
Once you have removed the rear wheel, first check the brake disc for any signs of wear or rust deposits. Inspect the hub and clean it thoroughly. Then, examine the brake pads for wear or damage. Clean the brake pads, or if necessary, replace them. Additionally, clean and lubricate the bolts that hold the brake pads inside the caliper. Clean and adjust the tension spring, ensuring everything is aligned properly, and fix them again in place ensuring enough free play.
Check The Hydraulic Fluid Condition
Carefully clean and set everything inside the brake caliper before reinstalling the rear wheel and fixing the brake caliper. Ensure there is free play in the brake. Next, check the condition of the hydraulic fluid by opening the rear brake master cylinder. If needed, drain and refill the fluid using a proper fluid draining kit. Ensure you remove any air bubbles from the fluid and regain proper fluid pressure after refilling. Finally, fix the top cap and tighten any remaining bolts.
Fine-Tune, Adjustments, And Test Ride
After fixing and reinstalling everything, you may need to fine-tune the brake, including adjusting the brake pedal position. Try adjusting the locknuts attached below the master cylinder piston to find the optimal brake pedal height. If you experience any discomfort, you may need to replace the piston. Once completed, your motorcycle's rear brake will be ready for a ride.
However, it's important to test the rear brakes after adjustments to ensure they are working properly. Start the motorcycle and apply the brakes to verify proper engagement. If you notice any issues with the brakes, further troubleshooting and resolution may be necessary; so, do it accordingly.
Remember, adjusting the rear brakes on motorcycles is an important part of maintenance that should be done regularly. Follow these steps to maintain your motorcycle's disc braking system. If you're ever in doubt about how to adjust hydraulic brakes, consult a professional mechanic for assistance and seek their guidance, that’s it.
T
Published by Saleh

About Saleh
Writer


Best Bikes

Price: 169800

Price: 255000

Price: 212000


