Shares 2
How To Prepare A Motorcycle Frame For Paint?
Last updated on 18-Jun-2026 , By Saleh
How To Prepare A Motorcycle Frame For Paint?
Over time, in the span of regular usage, we often need to repair, restore, or customize our motorcycles. In the time of such restoration or maintenance work, one of the most crucial aspects is giving various parts a fresh coat of paint. Therefore, the motorcycle frame should be given priority to get a new color coat, as it not only gives it a new look but also helps it last longer. Therefore, here we will describe how to prepare a motorcycle frame for painting. Let's get started.

How To Prepare A Motorcycle Frame For Paint?
Guys, if you're a motorcycle enthusiast, customizing your motorcycle's appearance can be an exciting project. However, achieving a smooth and long-lasting finish when painting motorcycle parts like the frame requires proper preparation. Preparing the frame before painting ensures better adhesion, durability, and a professional-quality appearance. So, let's learn how to prepare the frame for painting.
Preparing The Workspace
Before starting the preparation process for painting the frame, we select a well-illuminated workspace with enough space and proper airflow. Gather the necessary materials such as motorcycle disassembling tools, degreasers, cleaning and washing materials, cotton rags, sandpapers of various grits, wire brushes, masking tape, plastic sheets or newspapers, etc. Also, make sure to wear safety gear such as safety goggles, gloves, and a respirator mask.
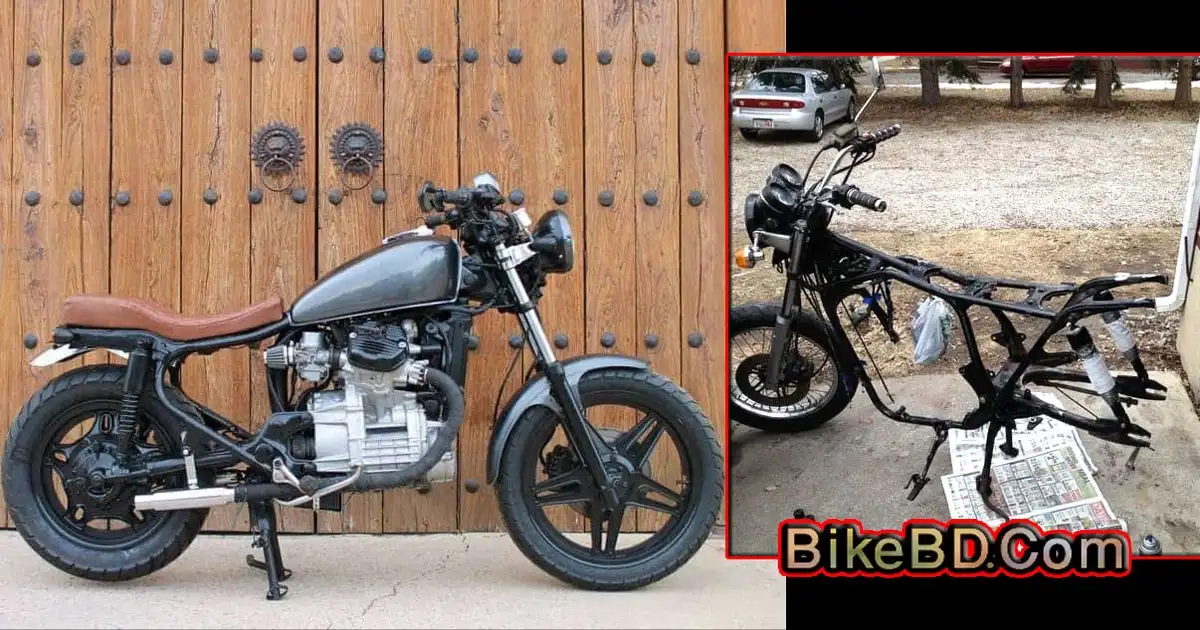
Disassembling The Motorcycle
To prepare the motorcycle frame for painting, it's necessary to completely disassemble the motorcycle and remove the frame from everything. Therefore, it is essential to disassemble various components such as the fuel tank, seat, exhaust, fairings, wiring, and any other removable parts, including the engine if necessary. This will provide better access to every corner of the frame and ensure an even paint job everywhere. However, during the disassembly process, make sure to keep all the fastening hardware and small parts organized in labeled containers for easy reassembly later.
Cleaning The Frame
Once the motorcycle frame is completely disassembled, you should clean the frame removing dust, rust, and old paint. Start by using a wire brush or sandpaper to scrub off any loose paint and rust. For more stubborn areas, you may need to use a chemical paint remover or a sanding wheel. Make sure to work in a well-ventilated area with sufficient airflow during this stage and wear appropriate protective gear when using chemical removers.

Once the old paint and rust have been completely removed, thoroughly clean the frame to eliminate any debris, grease, or dirt. Begin by using a degreaser to remove any oil or greasy buildup. Then, wash the frame with soap and water, gently scrubbing to remove any remaining residue. Rinse the frame thoroughly and dry it completely. Next, inspect the frame for any signs of wear, cracks, or fissures. If any issues are found, proceed with the necessary repair work. Otherwise, move on to the next step.
Preparing The Frame Surfaces
To achieve a smooth paint finish, it's necessary to prepare the surface of the frame. Start by sanding the entire frame using finer grits of sandpaper. This will help smooth out any imperfections on the frame surfaces and create an even surface to ensure an even coat of paint. After sanding, wipe off and clean the frame with a clean cotton rag to remove any dust or debris.
Now, the frame is almost ready for the paint job. However, before applying primer and paint, you need to protect the areas that you don't want to paint, such as shaft holes, bearings, engine, wiring, and other components. You can use masking tape, plastic sheets, or newspapers to mask and cover these components. Take enough time during the masking process to ensure a secure seal around the edges, preventing paint from seeping through.
You Are Now Ready To Start The Paint Job
Once you have masked and covered the necessary parts and components of the frame, you are ready to start painting the frame. Hang and fasten the frame from the ceiling or a suitable support. Begin by applying a base paint or primer coat to the frame. Select a high-quality primer suitable for your motorcycle frame material. Apply the primer evenly using smooth, overlapping brush strokes. Allow the primer to dry completely, following the manufacturer's instructions. Now, you have done with the preparation and the motorcycle frame is completely ready for the final paint application.
T
Published by Saleh

About Saleh
Writer
You might also be interested in


Best Bikes

Price: 169800

Price: 255000

Price: 212000