Shares 2
How To Bleed A Dry Hydraulic Brake System?
Last updated on 19-Jun-2026 , By Saleh
When it comes to maintaining a motorcycle periodically to ensure optimal performance and safety, few things are as crucial as the braking system. Hydraulic braking systems are widely used in modern motorcycles due to their efficiency and reliability. However, over time, the hydraulic system can develop clogs, which can lead to a spongy brake or brake failure. To address this issue, bleeding the hydraulic brake system is essential. So, here we have a step-by-step process on how to bleed a dry hydraulic brake system.

How To Bleed A Dry Hydraulic Brake System: A Step-By-Step Guide
Hydraulic braking systems are a crucial part of motorcycles that ensures safety and support performance features accordingly. However, just like general maintenance for the motorcycle, the braking system also requires maintenance.
Over time, air can get inside the system, moisture can develop, and brake fluid can dry out also. To restore optimal braking performance, the system needs to have air bubbles bled out. Consequently, here we will guide you through the step-by-step process of bleeding a dry hydraulic brake system. Let's take a look.
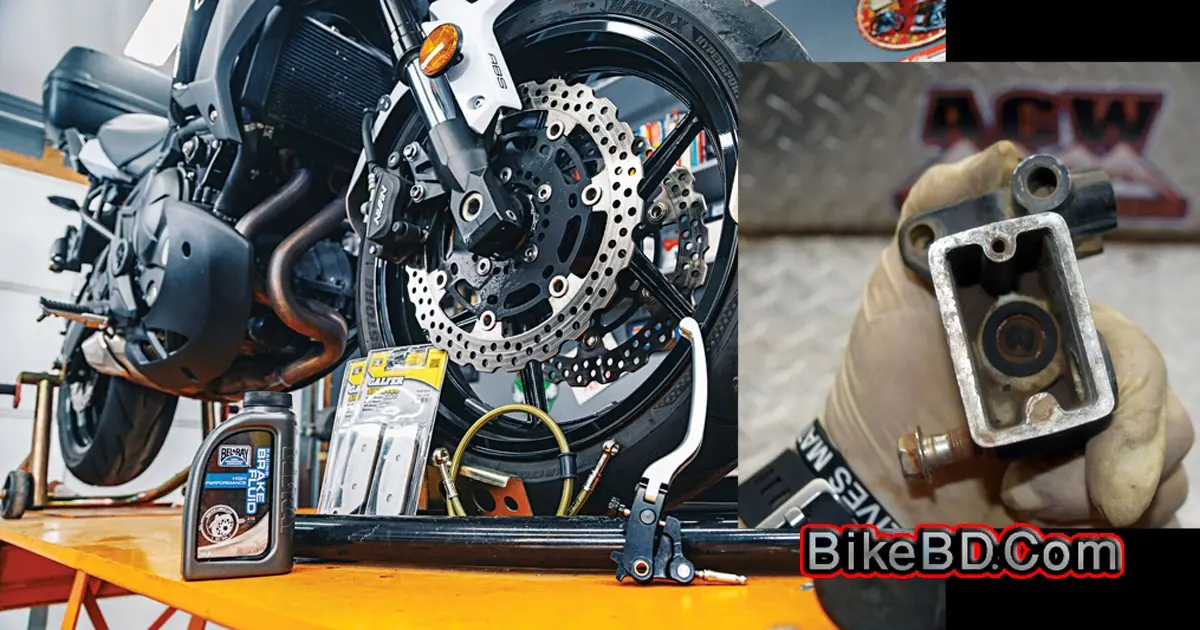
Gather The Necessary Tools And Materials
Before you begin bleeding the hydraulic braking system of your motorcycle, ensure you have the necessary tools and supplies listed below. For more details, you can refer to your motorcycle service manual. The general tools and gear you may need are:
- Recommended grade brake fluid (check the manual for the correct type and grade).
- A wrench or socket set to loosen the bleeder valves.
- Screwdrivers to open the master cylinder.
- Clear plastic tubing that fits the bleeder valves.
- A clean container to collect the drained brake fluid.
- A brake bleeding kit (optional).
- Cotton rags.

Position The Motorcycle And Prepare For Bleeding
Once you have gathered all the necessary tools, park the motorcycle on a level surface using the center stand or a paddock stand. Lift the wheel off the ground for the brake you are going to work on. Refer to the motorcycle's manual to identify the entire brake assembly. Locate the brake fluid reservoir, the related caliper, and the bleeder valve on the caliper. Before starting the work, clean the entire assembly to prevent any contamination from dirt.
Begin Bleeding The Brakes
Start by cleaning the brake assembly to remove any dust or dirt. Open the master cylinder or fluid reservoir and add an adequate amount of brake fluid. Then, locate the bleeder valves on each brake caliper. These valves are typically small metal nipples covered with rubber caps.
Refer to the motorcycle manual to locate the bleeder valve if needed. Then attach the clear plastic tubing securely onto the bleeder valve of the corresponding brake caliper. Submerge the other end of the tubing into a clean container, making sure it is submerged in some brake fluid to prevent air from entering the system.
Next, press the brake pedal several times and hold it down firmly. Slowly open the bleeder valve using a wrench or socket. The fluid will flow out into the tubing and the brake pedal will move downward further. At this point, tightly close the bleeder valve using the wrench. Finally, release the brake pedal slowly.
To bleed out the old fluid and air bubbles from the brake mechanism, repeat these steps several times until a steady flow of clean brake fluid comes out without any air bubbles. Next, move on to the next wheel brake and repeat the same process until all brakes have been bled.
However, throughout the entire bleeding process, regularly check the brake fluid reservoir to ensure it does not run dry. If needed, top up the reservoir with fresh brake fluid of the recommended grade. Be cautious not to introduce air into the system while doing the job. Additionally, having an assistant to help you during the bleeding process can be beneficial.
Recheck And Get A Test Ride
After bleeding all the brakes, carefully test the brakes by firmly pressing the brake pedals. The brake should feel firm and responsive. If everything seems fine, confirm that you have securely tightened all the bleeder valves. Also, ensure that the reservoir cap is tightly sealed. Clean up any spilled brake fluid with water and dispose of the old fluid safely. Then, take the motorcycle for a short test ride in a safe area to confirm that the brake system functions properly and has no issues.
So, with this step-by-step process, you may have successfully removed air bubbles from the hydraulic braking system and restored its efficiency. However, bleeding a dry hydraulic brake system is a vital maintenance task. If you are unsure or uncomfortable performing this task, seek the assistance of a qualified mechanic to ensure proper brake system maintenance and to get the job done correctly and safely.
T
Published by Saleh

About Saleh
Writer


Best Bikes

Price: 169800

Price: 255000

Price: 212000