Shares 2
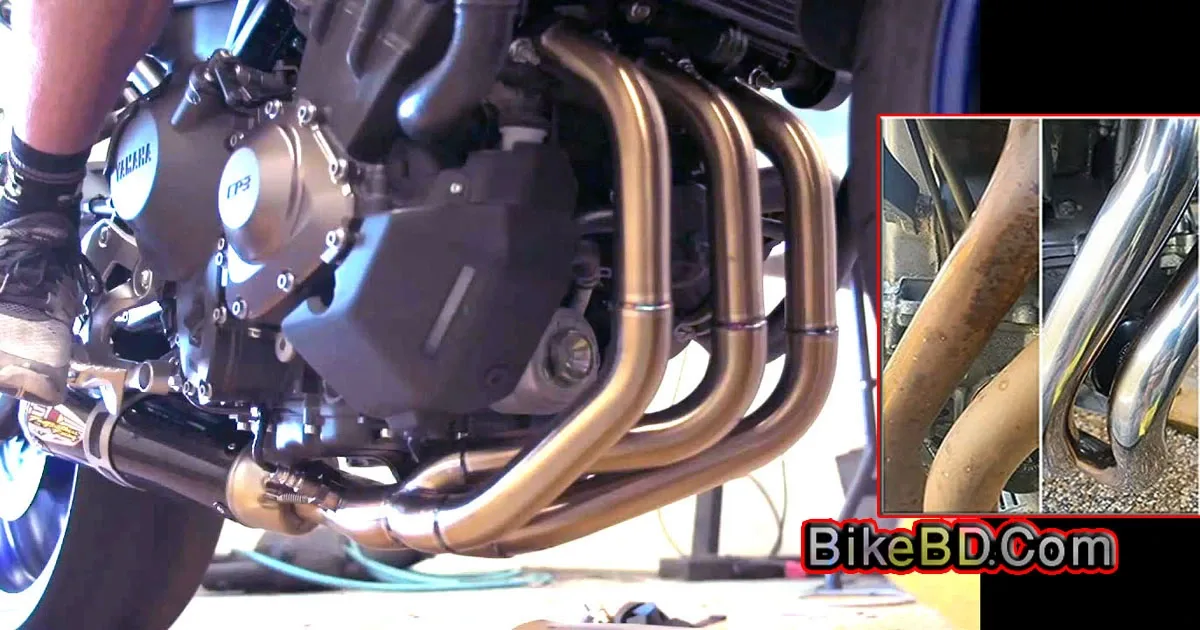
How To Clean Motorcycle Exhaust Headers?
Last updated on 18-Jun-2026 , By Saleh
Motorcycle enthusiasts are always very keen on the regular maintenance of their motorcycles, which is obviously crucial for keeping them in top-performing condition. However, one often overlooked area that requires attention is the exhaust system, specifically the exhaust headers. Over time, these headers become dirty and clogged with dirt and carbon deposits, which not only look bad but also decrease their durability. In today's discussion, we will describe the process of how to clean motorcycle exhaust headers.

How To Clean Motorcycle Exhaust Headers?
The exhaust headers of a motorcycle may not directly impact performance, but they do have a part in overall performance and efficiency as an integral part of the motorcycle's exhaust system. Over time, due to dirt and rust deposits, they can experience a decrease in lifespan, and a dirty, rusty exhaust header can diminish the overall appearance of a motorcycle.
Therefore, it is important to perform regular maintenance on motorcycle exhaust headers, including cleaning and polishing at specific intervals. A clean and shiny exhaust header not only enhances the aesthetics but also ensures better performance by working seamlessly with the entire exhaust system. In this discussion, we will describe the cleaning process, but before we proceed, please ensure that you have the necessary tools and cleaning materials listed below.
Also Read: Helite GP Air Price In Bangladesh
- Mild degreaser or a specialized exhaust cleaner.
- Rust remover (if required).
- A wire brush or toothbrush.
- Cotton rags or a piece of sponge.
- High-temperature paint (if required).
- Protective spray (optional)
- Safety goggles and gloves
Before you begin, gather the necessary tools and cleaning materials. Start by parking your motorcycle in a well-ventilated area or outdoors to prevent inhaling any fumes. Ensure that the bike's exhaust headers have completely cooled down to avoid any risk of burns. Prioritize your safety by wearing protective gloves to shield your hands from chemicals and sharp edges. Additionally, don safety goggles to protect your eyes from debris or cleaning solutions.
Cleaning Process For Rusty Motorcycle Exhaust Headers
Once you have prepared yourself and the motorcycle, begin by removing any heat shield that may be present on the exhaust headers. Some motorcycles have heat shields or extended baseplates covering the exhaust headers. If your bike has them, carefully follow the manufacturer's instructions to remove them and set them aside for separate cleaning. This step will allow better access for cleaning.
Also Read: Indian Super Chief Limited Price In Bangladesh - BikeBD
With the exhaust header exposed, start by soaking the pipes with water and removing any loose dirt, grime, or carbon deposits from the exterior using a wire brush or toothbrush. Be gentle to avoid scratching the surface, and then wipe the pipes with cotton rags. Next, spray a mild degreaser or exhaust cleaner onto the headers, focusing on areas with stubborn deposits. Let the cleaner sit for a few minutes to break down the dirt and carbon buildup.
Thoroughly scrub the exhaust headers using a soft cloth or sponge. Pay close attention to hard-to-reach areas and ensure that all surfaces are properly cleaned. If necessary, use the wire brush or toothbrush to remove any remaining deposits. While cleaning, carefully inspect the exhaust headers for any signs of deep rust. If you spot rust patches, you may need to use a rust remover to address the issue. Follow the instructions provided by the rust remover manufacturer.
After scrubbing and cleaning, rinse the exhaust headers with clean water to remove any residue from the degreaser or exhaust cleaner. Then, use a soft cloth to dry them, preventing water spots or corrosion. Take a moment to inspect the headers for any signs of damage or wear. If needed, apply high-temperature paint to protect and restore the appearance of the headers. Alternatively, if the pipes are chrome-coated, use a polishing agent to achieve a shiny finish.
Once everything has been cleaned, dried, properly polished, and restored in good condition, proceed to reassemble any heat shields, baseplates, and other components that were previously removed. If desired, to maintain the cleanliness and shine of the exhaust headers, consider applying a specialized protective spray designed for metal surfaces before reassembling the parts. Take a moment to double-check that all components are properly screwed and positioned. Once you have ensured everything is securely placed, your task is complete.
T
Published by Saleh

About Saleh
Writer


Best Bikes

Price: 169800

Price: 255000

Price: 212000